
Tinkercad for Teachers
A comprehensive guide to getting started with Tinkercad in your classroom

What is Tinkercad?
Tinkercad is a free online program that allows users to create their own 3D designs. These files can then be saved and printed using a 3D printer. There are other uses for Tinkercad, too, such as designing projects for laser cutting or laying out circuits.
Why use Tinkercad?
Tinkercad is free and online, meaning there is no software installation needed. It also means that students' designs are saved online, so they can be accessed from anywhere. Students can continue to work on their projects or start new ones at home.
Tinkercad is also classroom-friendly, allowing teachers to set up classes and access their students' designs, which is extremely helpful when you need to look at or modify student designs.
Step 1: Set Up an Account


Go to the Tinkercad webpage.
Open an Internet browser. In the address bar type in www.tinkercad.com.

Click Sign Up.

Click Educators start here.
Just follow the steps on the screen to finish setting up your account. You will need to enter your e-mail and create a password. You will also need to agree to a privacy statement.

Verify your e-mail.
The final step requires you to verify your e-mail address so be sure to check your e-mail.
Step 2: Set Up Your Class

Start a New Class
On your Tinkercad home screen, click Create a New Class.
Hint: You can always go back to your home screen by clicking on the Tinkercad logo in the top left corner.

Name Your Class
Give your class a name and choose the grade level and subject. If no grade or subject fits your exact situation, just select whatever is closest.

Choose Your Class
Click on the name of your class.

Begin Adding Students
Click on Add students.

Enter Your Students
Enter one student's name. Tinkercad will automatically assign the student a nickname. Change the nickname to something that will be easy for both you and your student to remember (such as first name + last initial).

Get Your Class Link
Continue adding your students until you have them all listed. You can have up to 250 students in a single class. Notice your Class Link. Students will need this code (as well as their nickname) to log in to Tinkercad.

Distribute Your Class Link
Click on Class Roster to get a printable list of students. You can cut along the dotted lines to create individual slips that you can pass out to students with their sign-in information. You can also make a poster with your Class Link or distribute it via Google Classrooms.
Step 3: Manage Your Class

Open the Class
Once your students have created their own projects, you may need to view their projects or modify them. From your home screen, click on the class you would like to see.

Select the Student
Select the particular student whose design you would like to view or modify. (Note: If you would like to see all of the designs from a particular class at once, you can also click Designs on the top toolbar.)

View or Modify the Design
You will now see the Design Gallery. Hover over the design you would like to view or modify. A "Tinker This" button will appear. Click on that. You will now be able to view, modify and export the student's design.
Step 4: Now What?

Complete Some Tinkercad Tutorials
Tinkercad has several built-in tutorials for teaching you the basics. Completing those lessons will help you become familiar with the Tinkercad interface. You can also have your students complete them to familiarize them with basic Tinkercad commands.

Add a Co-Teacher
If you have another teacher, print manager or someone else who needs to access students' designs, you can make them a co-teacher. Be sure this is someone you trust because this person will be able to modify your students' work!

Check Out Some Lesson Plans
Under Resources Tinkercad also offers some Lesson Plans. Depending on your classroom goals, these may or may not be helpful, but they may at least inspire some ideas. (Note that many of the lesson plans encourage 3D modeling without the goal to actually print the design.)

See What Tinkercad Can Do
From your home screen, click on Designs. This will show you the 3 primary options in Tinkercad:
(1) 3D Designs: The most popular use of Tinkercad is for creating 3D designs. With its drag-and-drop interface, Tinkercad makes it easy to quickly create 3D models.
The interface is intuitive enough that most students will need minimal instruction to figure out how to create 3D models. For example, you may want them to create a model of their dream home, and they can drag shapes (or objects from Tinkercad's special collections) in place to do that.
If you want your students to create models that can actually be 3D printed, they will need more guided instruction. They must consider things like size and supports. For this reason, I like to used guided tutorials with my students--projects that encourage creativity and personalization while simultaneously teaching students design techniques and ensuring that the final project is actually printable.

A 5th-grader’s Free Design (Fun but not printable)

The same 5th-grader’s design when using a guided tutorial (Creative and printable)
Needs some ideas? Check out these guided tutorials for beginners!


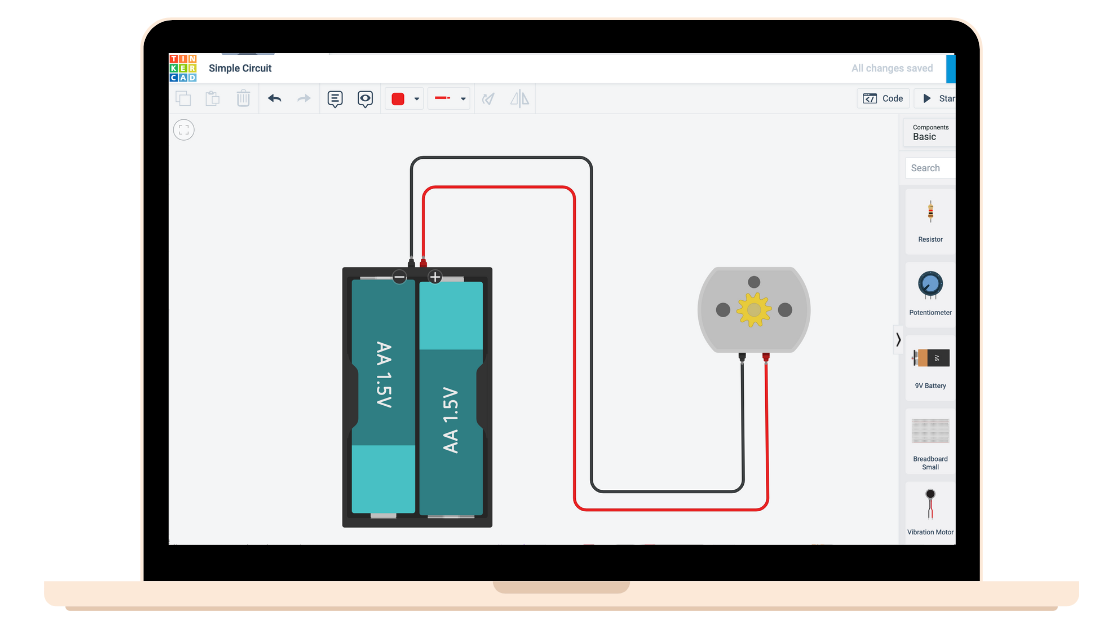
(2) Circuits: You can also use Tinkercad to create your own virtual circuits. Use the Basic Circuits to create simple electronic projects, such as making an LED light up or making a motor spin. These are great for testing out projects virtually before trying the real thing. There are also more advanced options using Micro:bit and Arduino.

(3) Codeblocks: Tinkercad can also be used to introduce students to block-based coding. The Codeblocks feature combines drag-and-drop blocks of code with the basic Tinkercad shapes, allowing you to create unique shapes with repeating patterns or even animate your design..